This is part 2 of 2 about using Elasticsearch and Kibana to track patterns in baby activity. Part 1 here covers the hardware and setup for tracking baby kicks.
Machine learning
Having collected about 6 weeks of baby kicking data, it’s time to test the new toy in the Elasticsearch stack: Machine learning.
Installing this was a straightforward case of following the instructions, and from the ‘Machine Learning’ new menu item in Kibana, I chose ‘Create new job’, and ‘Create a single metric job’:

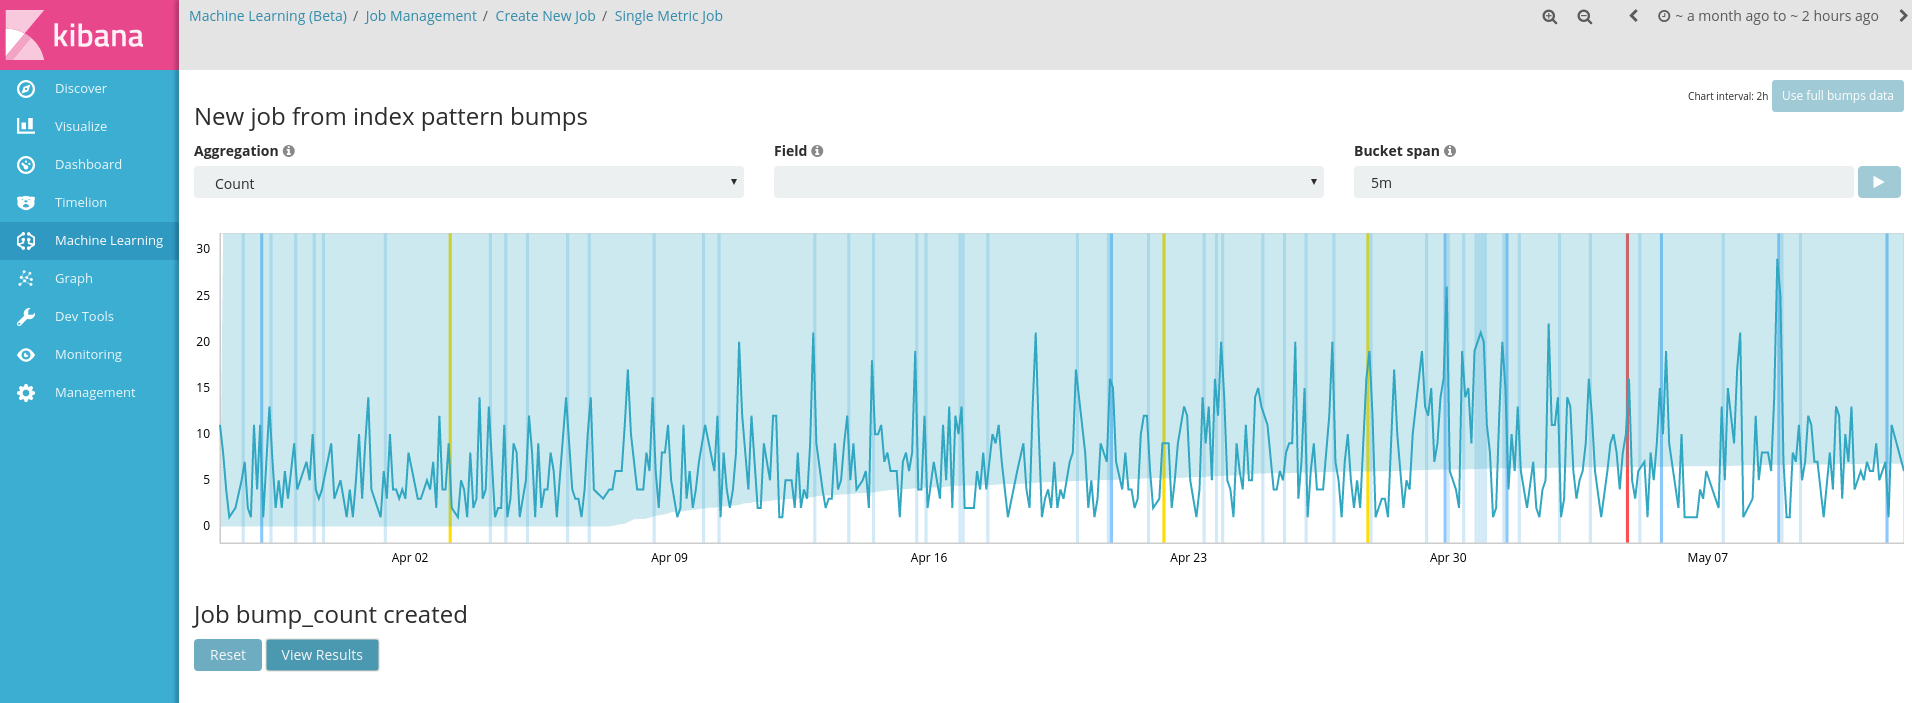
Pointing it towards my index, choosing aggregation ‘Count’ and then Create job and you get a nice preview of the analysis scanning through the data and highlighting anomalies as it goes:

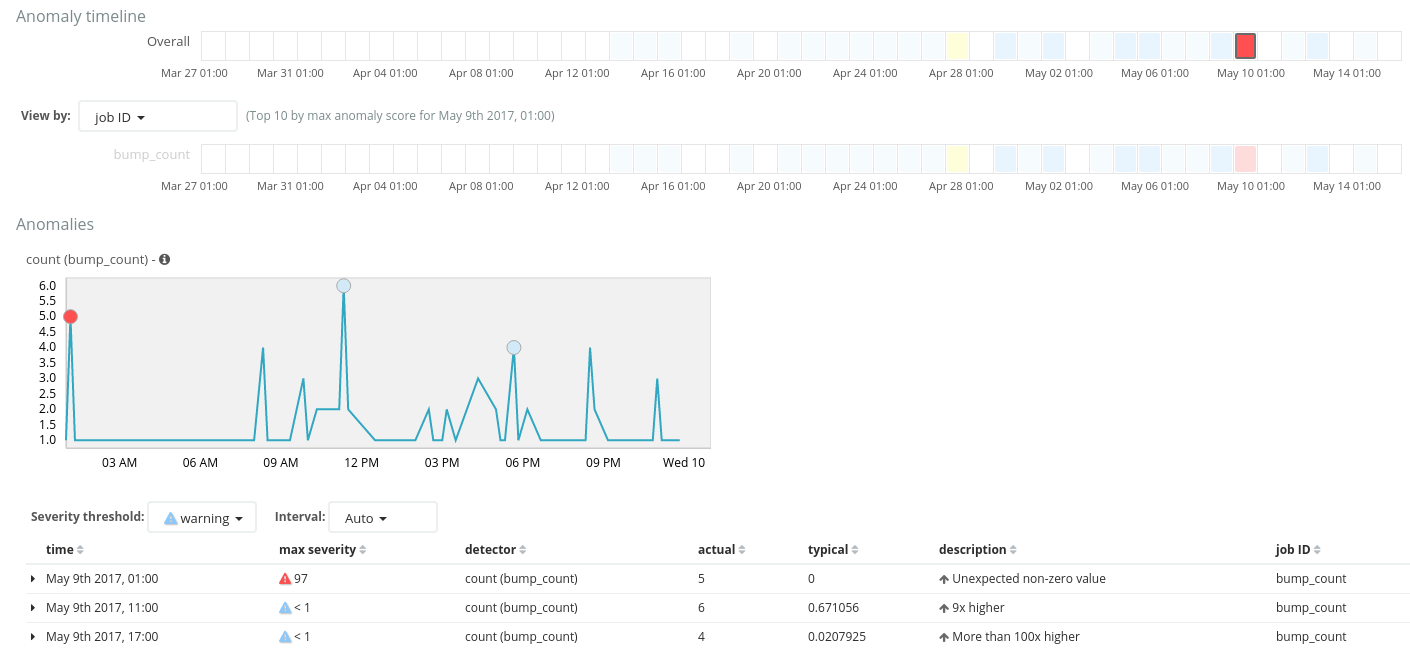
Once this is complete you can open up the Anomaly Explorer and run through events that it has identified as anomalous:

It has detected that 5 kicks at 1am are unusual where no activity would be expected, and identified this purely from the implicit patterns without needing to be trained what to expect (ie. unsupervised machine learning) - neat!
I did some reading up on the medical advice for expectant mothers monitoring baby activity, which as often is the case is a bit mixed depending on what you read. It used to be a simple rule of thumb: time how long it takes for 10 kicks to be felt (so called ‘count to 10’) and if this is within 2 hours, everything is fine. Apparently this is a bit of a broad generalisation and activity varies quite widely from baby to baby. What’s emphasised now is it’s important to spot changes in the normal pattern of activity for your particular baby - all babies being different.
We wanted to spot the situation where activity drops from normal, which could be indicative of a problem. So I created another job with aggregation type ‘Low count’ of these anomalies.
None were identified in our data - phew! :-)
And just to test this theory I wanted to remove a period of data and see whether the anomaly detection would pick up this simulated drop in activity. To do this I could have manually deleted data, but instead I used the powerful and underrated index aliases feature to create an alias to my original data limited by a query excluding a gap of time on 1st May:
echo '{
    "actions" : [
        {
            "add" : {
                 "index" : "bumps",
                 "alias" : "bumpless",
                 "filter": {
                 	"bool": {
                 		"must_not": {
                 			"range": {"timestamp": {"gte": "2017-05-01T01:15:00", "lt": "2017-05-02"}}
                 		}
                 	}
                 }
            }
        }
    ]
}' | curl -XPOST -u elastic:changeme localhost:9200/_aliases
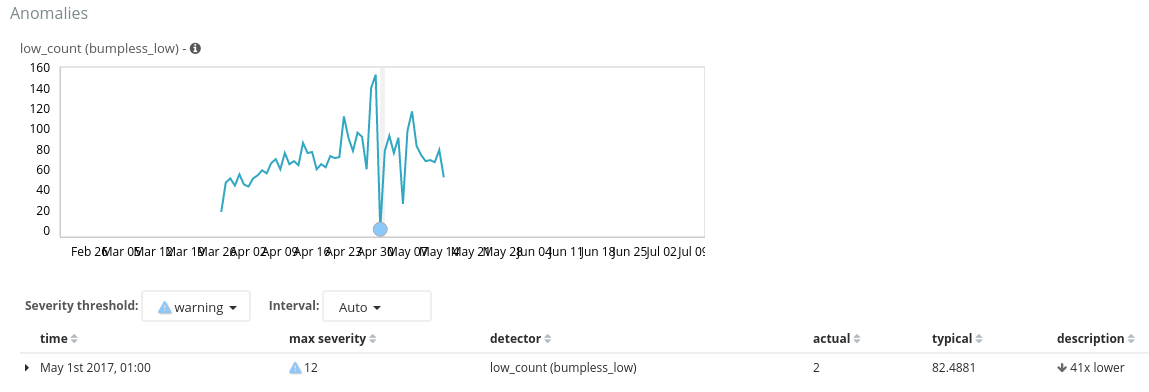
And finally, running the same low count job on this flagged this period as 41x lower. Great - simulated anomaly correctly identified.

In conclusion
This simple example illustrates the ML module has great potential application in the field of health monitoring (with suitable caveats - I am not a doctor, etc!).
One last thing to be noted: X-Pack that the Elasticsearch ML module is part of is a licensed (paid-for) feature. You get a trial license to the full functionality for 30 days.